使用JAIL自建服务教程之七:搭建cloudreve私有云盘
本文介绍如何在truenas/freenas系统的jail中安装cloudreve私云盘。
Cloudreve是一款开源网盘系统,支持使用七牛、又拍云、阿里云OSS、AWS S3、onedrive、onedrive(世纪互联版)等对象存储作为存储后端,支持aria2离线下载,支持图片、视频、音频、Office文档在线预览,支持文本文件、Markdown文件的在线编辑,支持WebDAV协议,可谓功能十分丰富。官网地址为:https://cloudreve.org/,github地址为:https://github.com/cloudreve/Cloudreve。不过官网上并没有freebsd系统的二进制文件,也没有使用freebsd系统编译的说明,全网也没有相关教程。我按照官网的文档,经过一番摸索,成功编译出freebsd可用的二进制文件,在此将过程分享给大家。当然,这款网盘没有客户端,作为日常使用是不方便,但是它还有一个大作用,请看《将TrueNAS资料同步到OneDrive世纪互联版》。
一、准备工作
首先当然是先建一个jail,不会的请看《使用JAIL自建服务教程之一:JAIL创建和优化》。
二、编译
(一)编译过程讲解:
1.安装必要的软件:
pkg install go node yarn statik git
2.获取源码
git clone --recurse-submodules https://github.com/cloudreve/Cloudreve.git
cd /root/Cloudreve
git checkout 3.2.1    //签出您要编译的版本,3.2.1是版本号,可以在官网查看最新版本并修改
3.构建静态资源
cd assets
yarn install
yarn run build
4.嵌入静态资源
cd ../
statik -src=assets/build/
5.编译
git rev-parse --short HEAD    //获取Commit,运行后会显示一个字符串
setenv COMMIT_SHA XXX    //这里的XXX为运行上一条命令显示的字符串
git describe --tags    //获取当前版本号,运行后会显示当前版本号
setenv VERSION XXX    //这里的XXX为运行上一条命令显示的版本号
go build -a -o cloudreve -ldflags " -X 'github.com/cloudreve/Cloudreve/v3/pkg/conf.BackendVersion=$VERSION' -X 'github.com/cloudreve/Cloudreve/v3/pkg/conf.LastCommit=$COMMIT_SHA'"
编译完成后,会在Cloudreve目录下生成一个文件名为“cloudreve”的二进制可执行文件。
(二)编译好的文件下载
这里也提供编译后的二进制可执行文件:点此下载。
解压密码:nj6m^6hFpQI
三、运行Cloudreve
./cloudreve
成功运行后,会出现如下图的提示,包括管理员账号和密码:
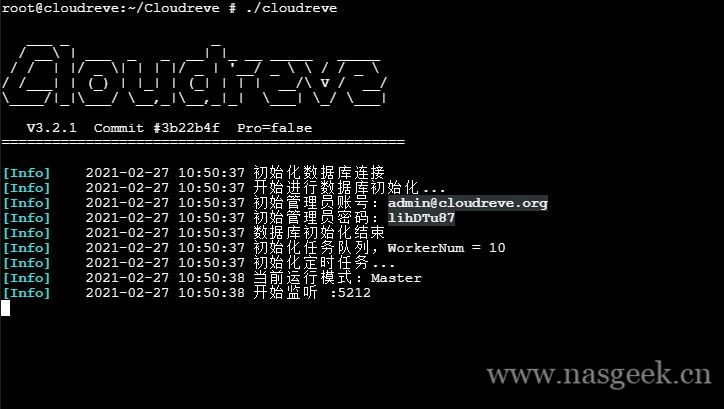
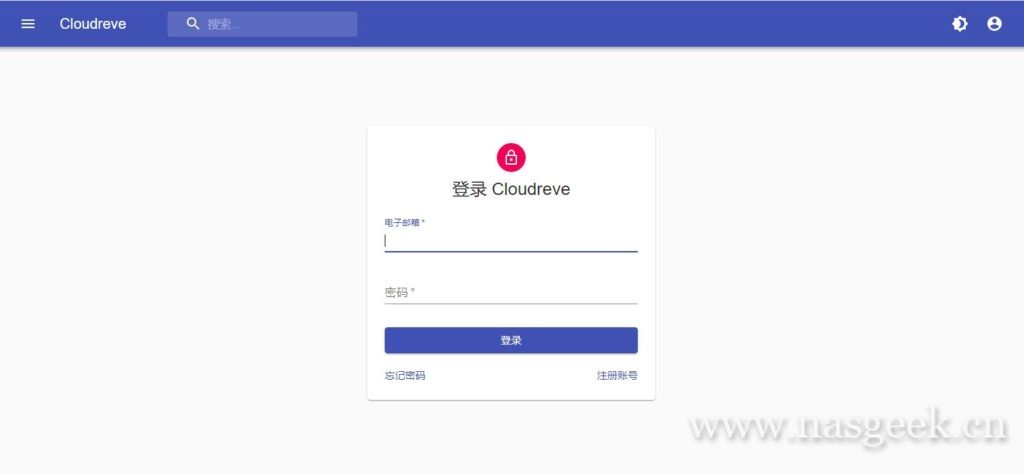
然后,在浏览器中输入http://ip:5212,看看吧!
四、设置开机启动
到目前为止,cloudreve算是成功编译运行了。不过有一个问题,jail的shell界面一关闭,cloudreve服务也会随之停止。所以,我们还必须让它在开机自动后台运行。
首先将编译好的程序放到一个新目录中。
mkdir /usr/local/bin/cloudreve
cp /root/Cloudreve/cloudreve /usr/local/bin/cloudreve/
chmod a+x /usr/local/bin/cloudreve/cloudreve
接着添加开机自动运行脚本。
mkdir /usr/local/etc/rc.d
nano /usr/local/etc/rc.d/cloudreve
//写入*行之间的内容
//**********************************************************************************************
#!/bin/sh
#
# PROVIDE: cloudreve
# REQUIRE: LOGIN
# KEYWORD: shutdown

# Description:
#    This script runs cloudreve as a service under the supplied user on boot

# How to use:
#    Place this file in /usr/local/etc/rc.d/
#    Add cloudreve_enable="YES" to /etc/rc.config
#    (Optional) To run as non-root, add cloudreve_runAs="your_user_name" to /etc/rc.config
#    (Optional) To pass cloudreve args, add cloudreve_args="" to /etc/rc.config

# Freebsd rc library
. /etc/rc.subr

# General Info
name="cloudreve"            # Safe name of program
program_name="cloudreve"   # Name of exec
title="cloudreve"          # Title to display in top/htop

# RC.config vars
load_rc_config $name      # Loading rc config vars
: ${cloudreve_enable="NO"}  # Default: Do not enable cloudreve
: ${cloudreve_runAs="root"}  # Default: Run cloudreve as root

# Freebsd Setup
rcvar=cloudreve_enable                   # Enables the rc.conf YES/NO flag
pidfile="/var/run/${program_name}.pid" # File that allows the system to keep track of kas status

# Env Setup
export HOME=$( getent passwd "$cloudreve_runAs" | cut -d: -f6 ) # Gets the home directory of the runAs user

# Command Setup
exec_path="/usr/local/bin/cloudreve/${program_name}" # Path to the cloudreve exec, /usr/local/bin/ when installed globally
output_file="/var/log/${program_name}.log" # Path to cloudreve output file

# Command
command="/usr/sbin/daemon"
command_args="-r -t ${title} -u ${cloudreve_runAs} -o ${output_file} -P ${pidfile} ${exec_path} ${cloudreve_args}"

# Loading Config
load_rc_config ${name}
run_rc_command "$1"
//************************************************************************************
接下来设置执行权限,添加开机自启,并启动程序。
chmod u+x /usr/local/etc/rc.d/cloudreve
sysrc cloudreve_enable=YES
service cloudreve start
最后,查看“/var/log/cloudreve.log”,找到初始密码,再登录http://ip:5212就可以了!cloudreve的具体使用教程请查看官网。
声明:本文为本站【NASGEEK】原创文章,未经许可不得转载!