在ubuntu系统中手动安装seafile企业版
前面我们介绍了如何在freenas/truenas中安装seafile私有云盘(链接:使用JAIL自建服务教程之四:搭建SEAFILE网盘),不过在freenas/truenas的软件源中只有社区版,没有企业版,而且官方网站上也只提供了ubuntu、debian和centos版本的安装程序。如果我们想要在freenas/truenas中安装企业版seafile该怎么办呢?在Debian版truenas未发布的情况下,只能“曲线救国”了:在虚拟机中安装linux系统,再安装seafile企业版。
由于seafile官方文档不够友好,对于初次接触的人来说有一定难度,网上也没有很详细的教程,因此我把ubuntu系统手动安装seafile专业版的详细步骤记录下来,力求大家按照本教程能够一步到位安装成功。
一、在truenas虚拟机中安装ubuntu系统
请参照《在TRUENAS 12虚拟机中安装WINDOWS 10操作系统》安装ubuntu 18.04系统,操作过程大同小异。安装完成后,开启ssh并允许root用户登录。
二、下载seafile企业版安装包
seafile中文官网上并没有直接提供企业版安装包下载,不过在英文网站上有。点击customer center 进入英文注册页面,按照提示注册成功并登录之后,就可以进行下载了,目前最新版是“seafile-pro-server_7.1.13_x86-64_Ubuntu.tar.gz”。如果你不想这么麻烦,可以从本站下载:点此下载。
三、准备安装环境
以下操作使用root用户登录ubuntu后进行。
1.安装mysql。
apt install mysql-server
mysql_secure_installation
//这里进行mysql初始化设置,不懂操作请自行搜索教程
mysql -uroot -p
  >use mysql;
  >ALTER USER 'root'@'localhost' IDENTIFIED WITH mysql_native_password BY '你的密码';    //更改验证方式
  >exit
2.安装其它必要软件。
ubuntu 18.04:
apt-get install python3 python3-setuptools python3-pip python3-ldap libmemcached-dev -y
pip3 install --timeout=3600 Pillow pylibmc captcha jinja2 sqlalchemy psd-tools django-pylibmc django-simple-captcha
apt install openjdk-8-jre-headless
ubuntu 20.04:
sudo apt install python3 libpython3.8 python3-setuptools python3-pil python3-ldap python3-urllib3 ffmpeg python3-pip python3-mysqldb python3-memcache python3-requests libmemcached-dev
pip3 install --timeout=3600 Pillow pylibmc captcha jinja2 sqlalchemy psd-tools django-pylibmc django-simple-captcha python3-ldap
apt install openjdk-8-jre-headless
3.新建用户、建立目录、上传安装包。
adduser seafile
//这里会要求输入新建用户密码和几项用户信息,用户信息空着就行了
adduser seafile sudo
mkdir /opt/haiwen /opt/haiwen/installed
//然后将下载的“seafile-pro-server_7.1.13_x86-64_Ubuntu.tar.gz”安装包上传到haiwen目录下
tar -xzf /opt/haiwen/seafile-pro-server_7.1.13_x86-64_Ubuntu.tar.gz
mv /opt/haiwen/seafile-pro-server_7.1.13_x86-64_Ubuntu.tar.gz /opt/haiwen/installed/
chown -R seafile /opt/haiwen
4.进行安装。
su seafile //切换到seafile用户进行安装
cd /opt/haiwen/seafile-pro-server-7.1.13
./setup-seafile-mysql.sh //安装过程中按照提示进行操作,不出意外应该可以安装成功了
mysql -uroot -p
 >use mysql;
 >ALTER USER 'seafile'@'127.0.0.1' IDENTIFIED WITH mysql_native_password BY '你的密码'; //更改验证方式
 >exit
5.添加开机自启。
su root    //切换回root用户
nano /etc/systemd/system/seafile.service
//将如下内容复制进去后,按“CTRL+O”保存,“CTRL+X”退出
[Unit]
Description=Seafile
After=network.target mysql.service
[Service]
Type=oneshot
ExecStart=/opt/haiwen/seafile-server-latest/seafile.sh start
ExecStop=/opt/haiwen/seafile-server-latest/seafile.sh stop
RemainAfterExit=yes
User=seafile
Group=seafile
[Install]
WantedBy=multi-user.target
//-----------------------------------------------------------------------
nano /etc/systemd/system/seahub.service
//将如下内容复制进去后,按“CTRL+O”保存,“CTRL+X”退出
[Unit]
Description=Seafile hub
After=network.target seafile.service
[Service]
ExecStart=/opt/haiwen/seafile-server-latest/seahub.sh start
ExecStop=/opt/haiwen/seafile-server-latest/seahub.sh stop
User=seafile
Group=seafile
Type=oneshot
RemainAfterExit=yes
[Install]
WantedBy=multi-user.target
//-----------------------------------------------------------------------
systemctl daemon-reload
systemctl enable seafile.service
systemctl enable seahub.service
systemctl start seafile    //立即启动seafile服务
systemctl start seahub    //立即启动seahub服务
su seafile    //切换回seafile用户,进行添加管理操作
./reset-admin.sh
//这里会要求你输入email和密码
su root    //切换回root用户
6.使用apache反向代理,并使用https访问。
apt install apache2
a2enmod ssl rewrite proxy_http
systemctl restart apache2
//接着上传证书到“/etc/ssl”目录中,本教程中证书放在“/etc/ssl/nasgeek”目录中
nano /etc/apache2/sites-available/seafile-ssl.conf
//将如下内容复制进去后,按“CTRL+O”保存,“CTRL+X”退出
//注意将ServerName改为你自己的域名
<IfModule mod_ssl.c>
	<VirtualHost *:443>
		ServerName xxx.xxx.com
		ServerAdmin webmaster@localhost
		DocumentRoot /var/www/html
		ErrorLog ${APACHE_LOG_DIR}/error.log
		CustomLog ${APACHE_LOG_DIR}/access.log combined
		SSLEngine on
		SSLCertificateFile	/etc/ssl/nasgeek/nasgeek.crt
		SSLCertificateKeyFile /etc/ssl/nasgeek/nasgeek.key
		<FilesMatch "\.(cgi|shtml|phtml|php)$">
				SSLOptions +StdEnvVars
		</FilesMatch>
		<Directory /usr/lib/cgi-bin>
				SSLOptions +StdEnvVars
		</Directory>
		Alias /media  /opt/haiwen/seafile-server-latest/seahub/media
		<Location /media>
			Require all granted
		</Location>
		RewriteEngine On
		#
		# seafile fileserver
		#
		ProxyPass /seafhttp http://127.0.0.1:8082
		ProxyPassReverse /seafhttp http://127.0.0.1:8082
		RewriteRule ^/seafhttp - [QSA,L]
		#
		# seahub
		#
		SetEnvIf Authorization "(.*)" HTTP_AUTHORIZATION=$1
		ProxyPass / http://127.0.0.1:8000/
		ProxyPassReverse / http://127.0.0.1:8000/
	</VirtualHost>
</IfModule>
# vim: syntax=apache ts=4 sw=4 sts=4 sr noet
//-----------------------------------------------------------------------
a2ensite seafile-ssl.conf
systemctl restart apache2
接下来将域名解析到此ubuntu的IP,就可以打开了!
7.进行系统设置。
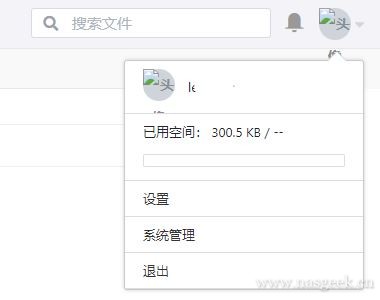
在浏览器中点击seafile页面右上角的头像(此时头像可能有问题),然后点击【系统管理】。
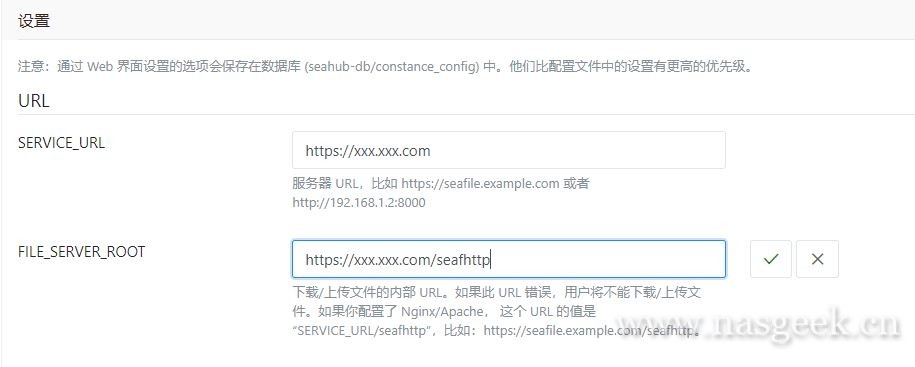
在“系统管理”页面左侧导航菜单中点击【设置】,将“SERVICE_URL”改为你的域名:https://xxx.xxx.com,将“FILE_SERVER_ROOT”改为https://xxx.xxx.com/seafhttp。改的时候别忘记点后面的绿色勾按钮。
这时你刷新页面,会发现头像并没有变得正常,这是因为seafile的缓存在作怪。运行下面的命令:
rm -f /tmp/seahub_cache/*
再刷新页面,发现显示正常了。
至此,企业版seafile私有云盘安装完成,不过未授权的企业版只允许3个用户,如有更多用户使用,请至官方购买。
声明:本文为本站【NASGEEK】原创文章,未经许可不得转载!